Configure GitLab Self-managed for Plane integration Pro
This guide walks you through setting up a GitLab application on your self-managed GitLab instance to enable GitLab integration for your Plane workspace. You'll need to create an application, configure authentication, and set the necessary permissions to ensure seamless integration.
INFO
Looking for GitLab Cloud? See Configure GitLab for Plane integration.
In this guide, you'll:
WARNING
Activate GitLab Self-managed integration
After creating and configuring the GitLab application and configuring the instance as detailed on this page, you'll need to setup the GitLab integration within Plane.
Create GitLab Application
- Log in to your GitLab instance.
- Click on your profile icon in the top-right corner.
- From the dropdown menu that appears, select Edit profile.
- Look for and select the Applications option within this menu.
- On the Applications page, click Add new application to begin configuring your OAuth application.
Fill in the application details with the following configuration:
Name Enter a descriptive name for your application (e.g.,
Plane Local DevorPlane Integration).Redirect URI The redirect URI depends on your Plane deployment:
For Plane Cloud:
https://silo.plane.so/api/oauth/gitlab-enterprise/auth/callbackFor Plane Self-Hosted:
https://<your-domain>/silo/api/oauth/gitlab-enterprise/auth/callback
Replace <your-domain> with your actual Plane instance domain.
Confidential Keep the Confidential checkbox enabled. This ensures the application uses a client secret for secure authentication.
Scopes Select the following scopes to grant Plane the necessary permissions:
api - Grants complete read/write access to the API, including all groups and projects
read_api - Grants read access to the API, including all groups and projects
read_user - Grants read-only access to your profile information
read_repository - Grants read-only access to repositories on private projects
profile - Grants read-only access to the user's profile data using OpenID Connect
email - Grants read-only access to the user's primary email address using OpenID Connect
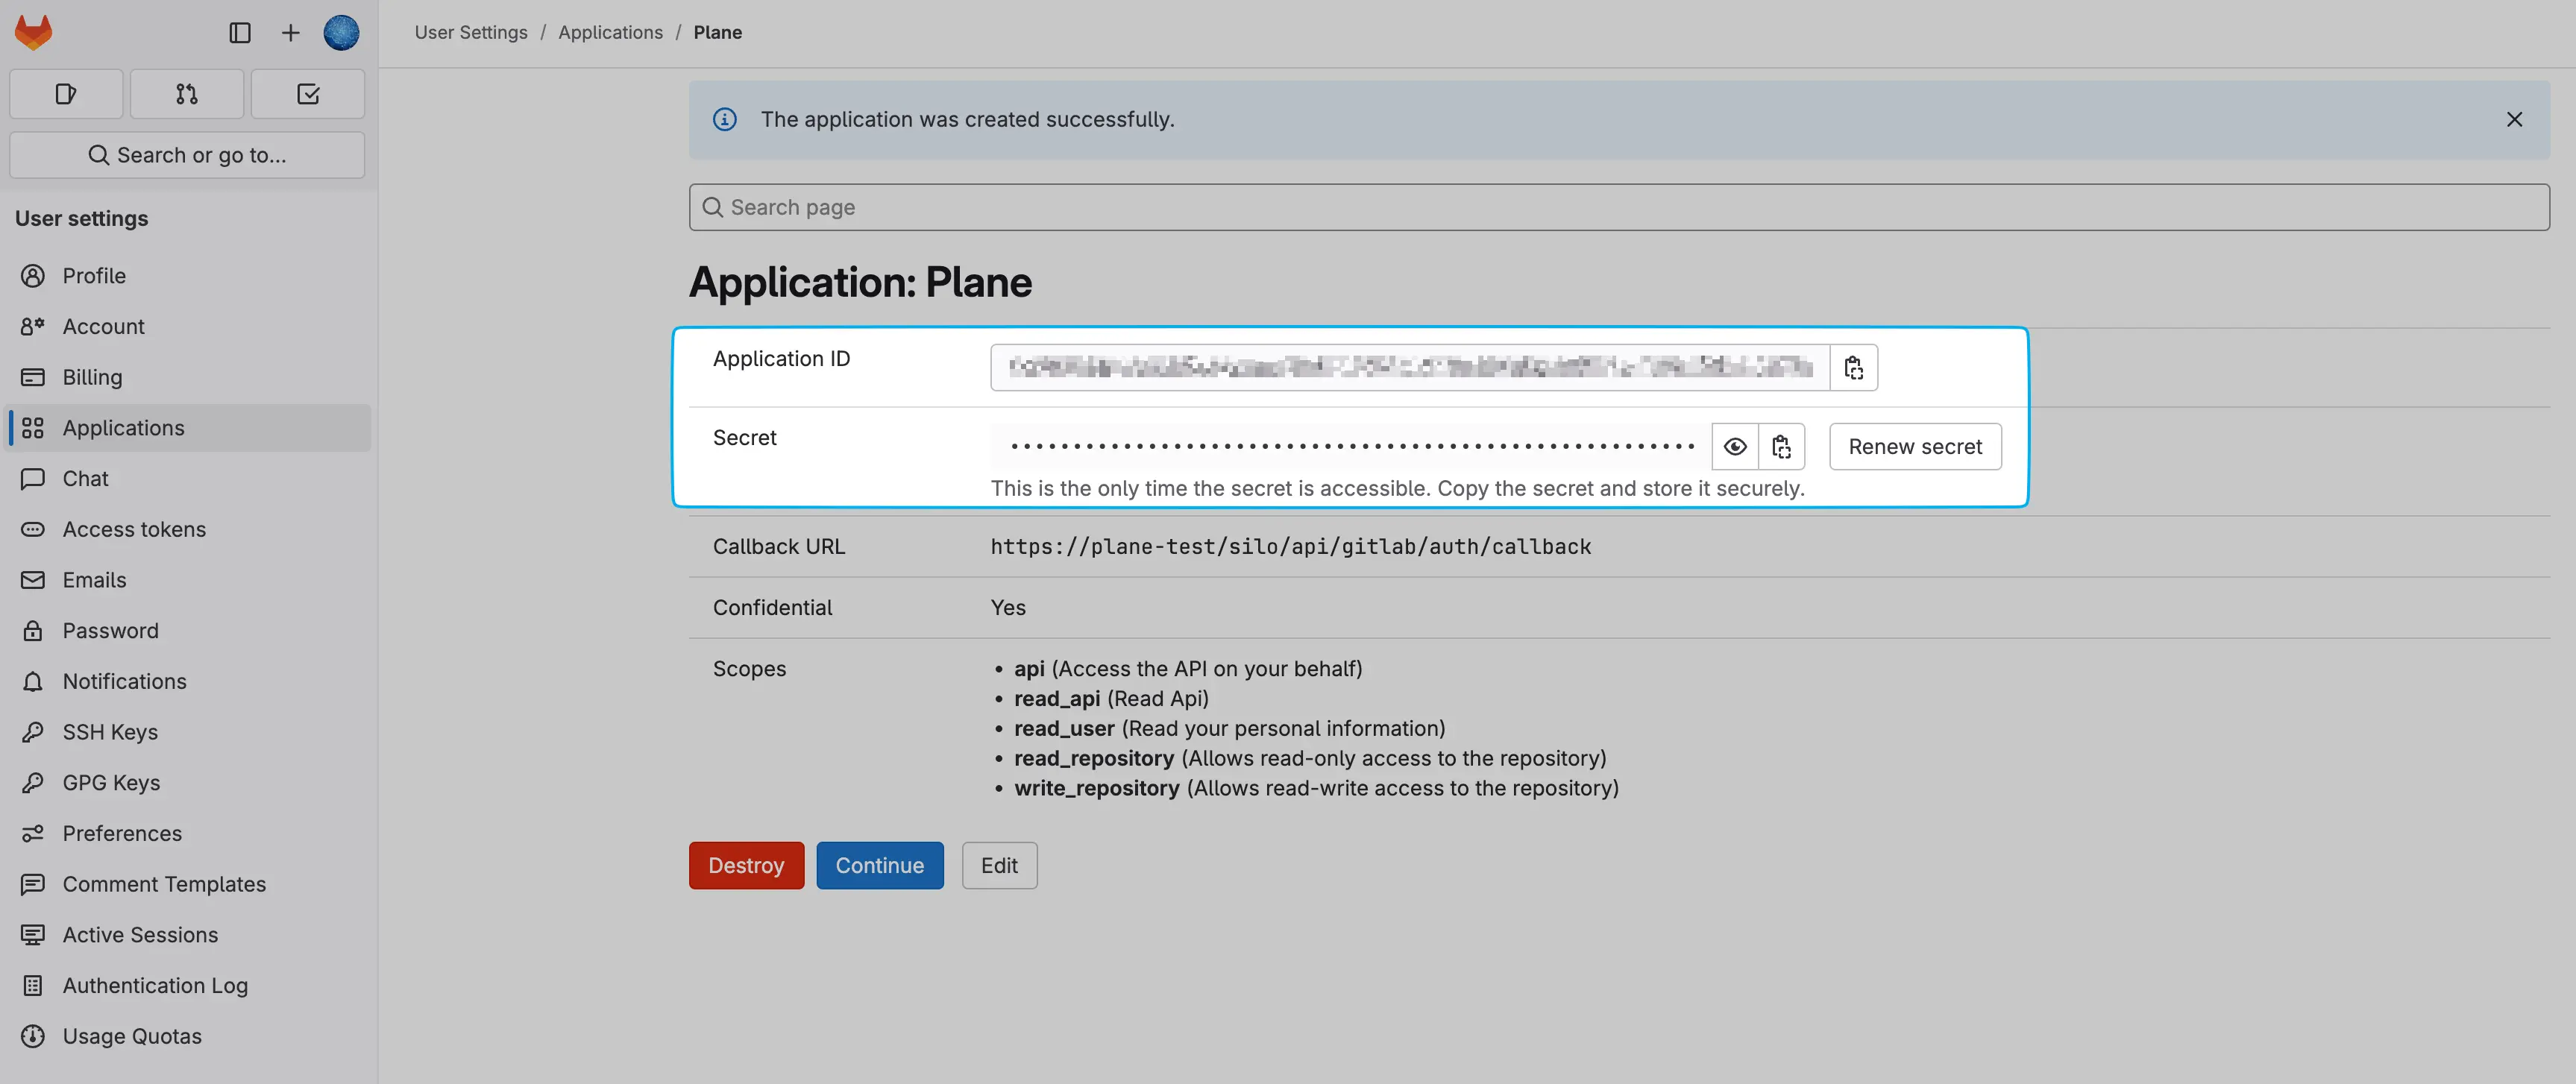
- Click Save application to create the OAuth application.
Configure Plane instance
Copy the Application ID and Secret from the newly created application.
Once you've created the application, activate the GitLab Self-managed integration in Plane.